понедельник, 2 апреля 2018 г.

PBK Ultimate Changing Table Knockoff

PBK Ultimate Changing Table Knockoff

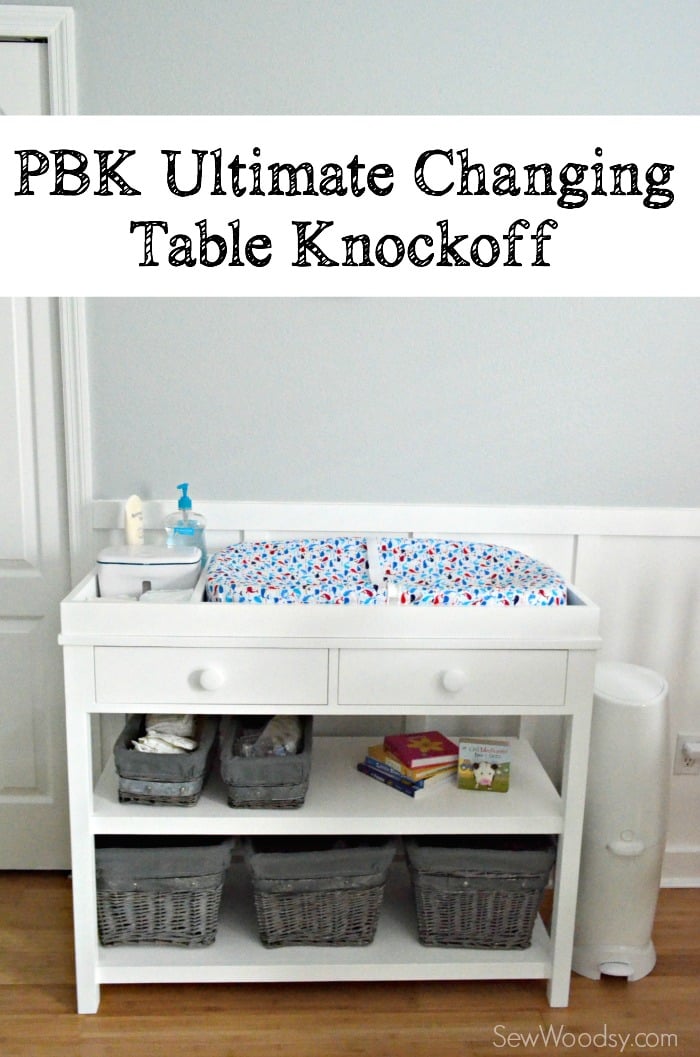
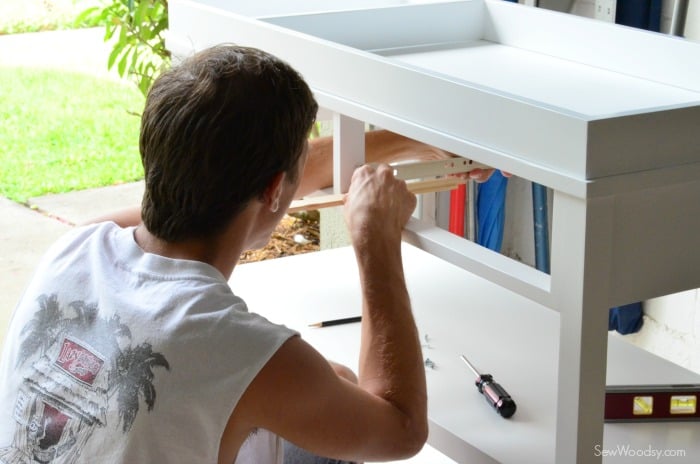
We started working with Ana on these plans for a knockoff version of the Pottery Barn Kids Ultimate Changing Table before Ryder was born. We got the plans the day before I was sent to the hospital to be induced. A week later we were home and my mother in-law insisted Jon and I get out of the house and take a few hours away from the baby. So we did, and where did we go? To The Home Depot to pick up supplies for this changing table. Then throughout the months (yes, as in April, May, and June) Jon worked on the changing table. A few cuts here, a few Kreg jigs there, until he finally was ready to paint! The changing table has been done for two months now and I’m so excited we finally get to reveal it on Sew Woodsy! It turned out great and it’s so nice to have the extra storage. We both know this changing table will be short lived and already have plans for where this will go once Ryder is done with it. Jon added brackets to the topper and they are attached to the back of the changing table so that we can take it off and have no damage to the actual furniture itself! For $100 you can have this knockoff version of the Pottery Barn Kids Ultimate Changing Table!

For the full plans head on over to http://ana-white.com/2014/08/plans/ultimate-changing-table

.*
TedsWoodworking Plans and Projects

Supplies to shop for:

  • 1/2 Sheet of 3/4” PureBond Hardwood Plywood
  • 2 – 2×2 @ 8 feet long
  • 3 – 1×2 @ 8 feet long
  • 1 – 1×6 @ 10 feet long
  • 1 – 1×4 @ 12 feet long
  • 1/4” PureBond Hardwood Plywood piece at least 16” x 35”
  • 2 – 1×3 @ 8 feet long (for topper)
  • 1-1/4” pocket hole screws

Cut List:

TABLE:

  • 4 – 2×2 @ 32”
  • 4 – 1×2 @ 14-1/2”
  • 4 – 1×2 @ 38”
  • 2 – 3/4” PureBond Hardwood Plywood @ 14-1/2” x 38”
  • 2 – 1×6 @ 14-1/2”
  • 1 – 1×6 @ 38”
  • 1 – 3/4” PureBond Hardwood Plywood @ 17-1/2” x 41”
  • 1 – 1×2 @ 38”
  • 3 – 1×2 @ 4-3/4”

DRAWERS

TOPPER

  • 2 – 1×3 @ 41”
  • 3 – 1×3 @ 16”

*Jon did all the pocket holes before building.

PBK Knockoff Changing Table

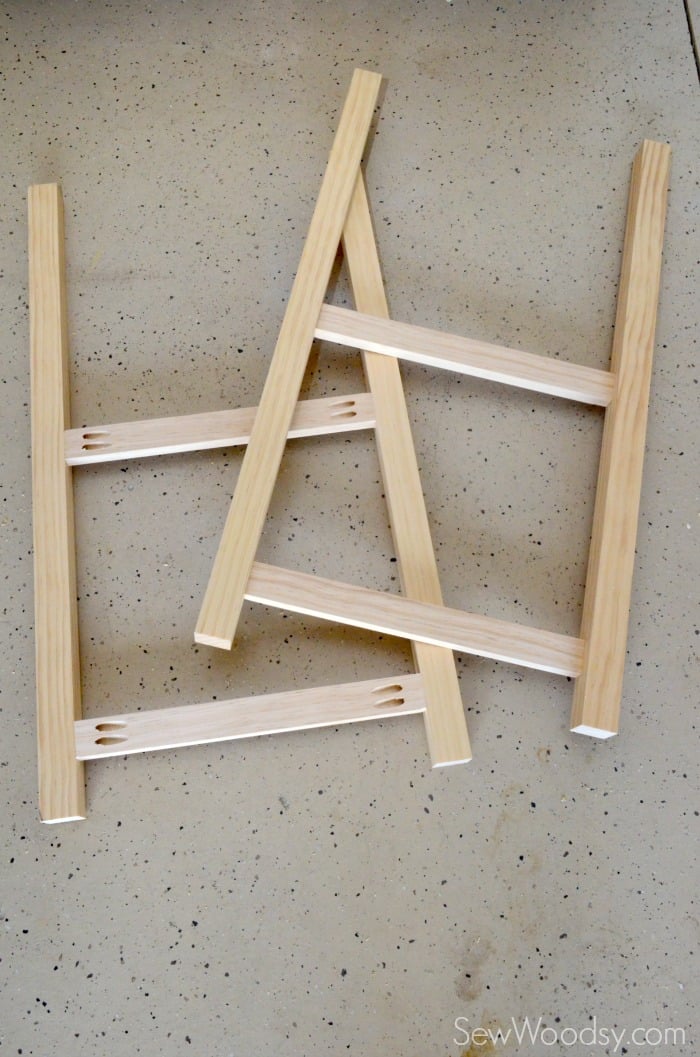
Drill (2) 3/4” pocket holes on each end of the 1×2 @ 14-1/2” long. Attach to the 2×2 legs with 1-1/4” pocket hole screws, flush to inside, keeping pocket holes hidden on insides. *The upper shelf can be placed at any height. In this plan, the upper shelf is placed to allow 12” height on lower shelf.

PBK Knockoff Changing Table

Drill 2 – 3/4” pocket holes on each end of the 1×2 @ 38” long and attach with 1-1/4” pocket hole screws to the 2×2 legs, at the same height as the side 1x2s. Keep 1×2’s flush to inside of the legs.

PBK Ultimate Changing Table Knockoff

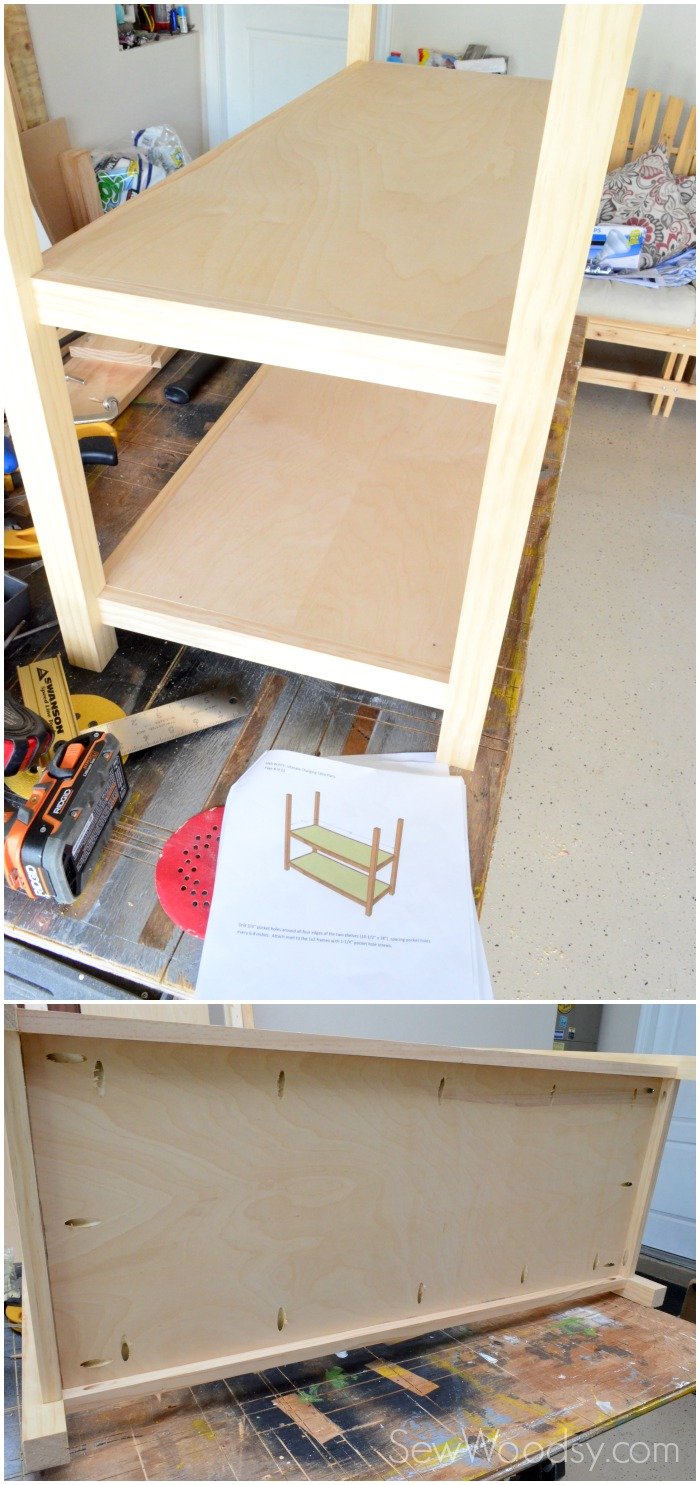
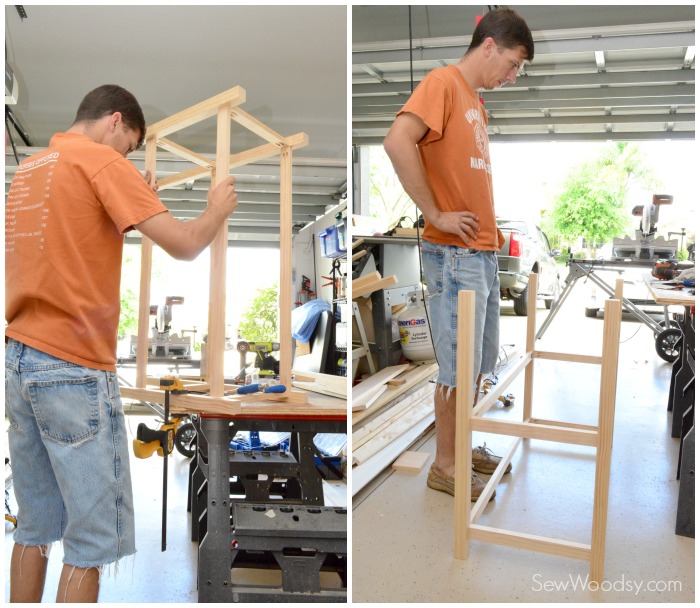
Drill 3/4” pocket holes around all four edges of the two shelves (14-1/2” x 38”), spacing pocket holes every 6-8 inches. Attach inset to the 1×2 frames with 1-1/4” pocket hole screws.

PBK Ultimate Changing Table Knockoff

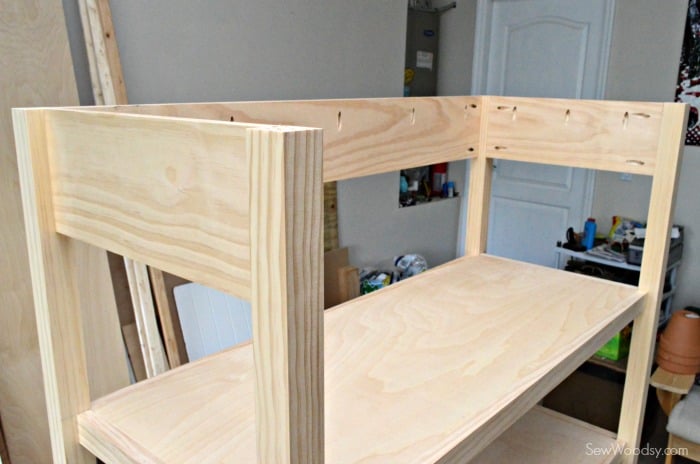
Attach the 1×6 side and back aprons with 3/4” pocket holes and 1-1/4” pocket hole screws. Also drill 3/4” pocket holes on the insides of the aprons facing upward to attach the top in later steps. The backboard should be flush to the outside of the legs.

PBK Ultimate Changing Table Knockoff
Attach top through predrilled pocket holes from previous step with 1-1/4” pocket hole screws.
PBK Knockoff Changing Table

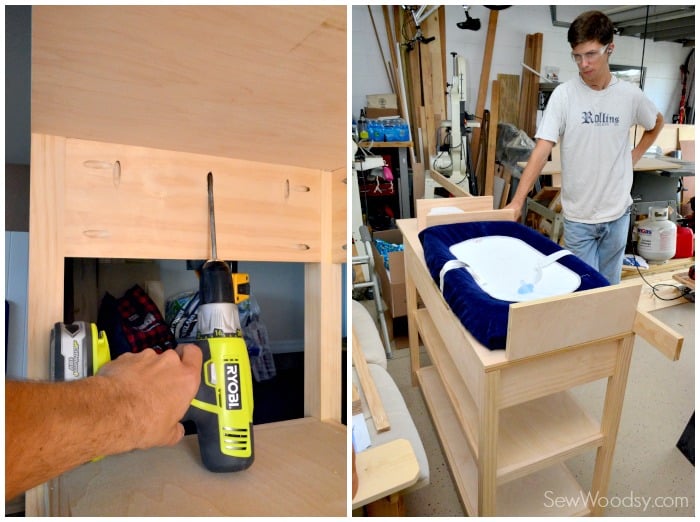
Attach the shorter 1×2 boards to inside of drawer area. Then attach bottom 1×2 with glue and finish nails we like to use our RYOBI Air Strike Brad Nailer – also use pocket holes to attach to legs.

PBK Knockoff Changing Table

Trim out around top with molding or 1×1’s to finish plywood edges. For a more finished look, miter corners which is what we choose to do.

PBK Knockoff Changing Table

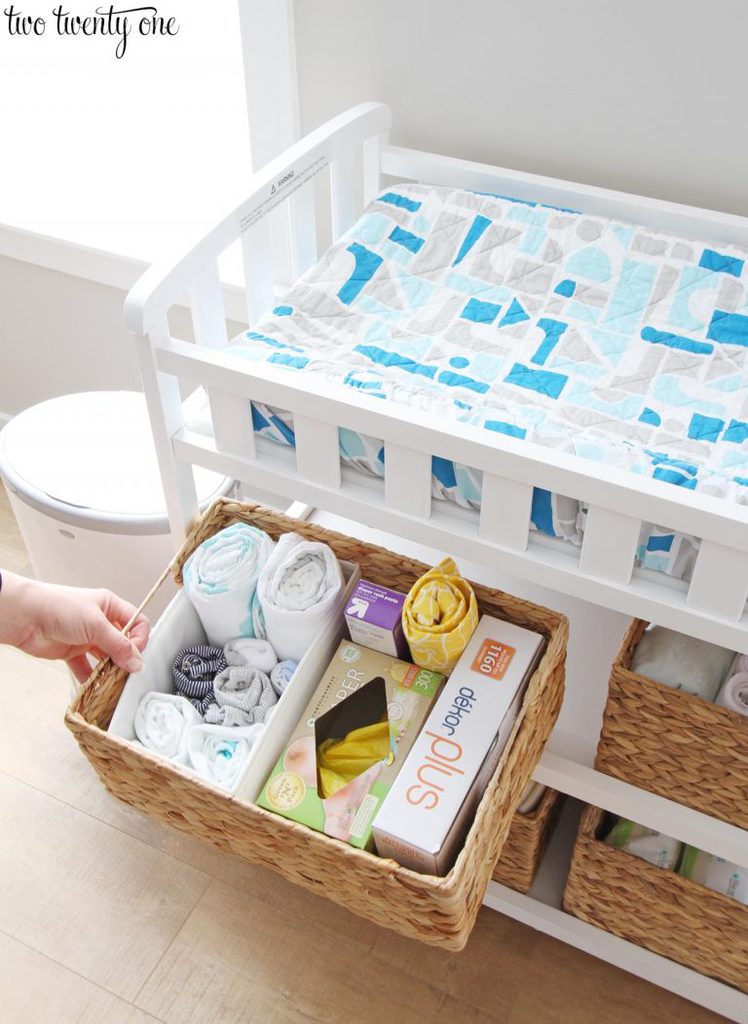
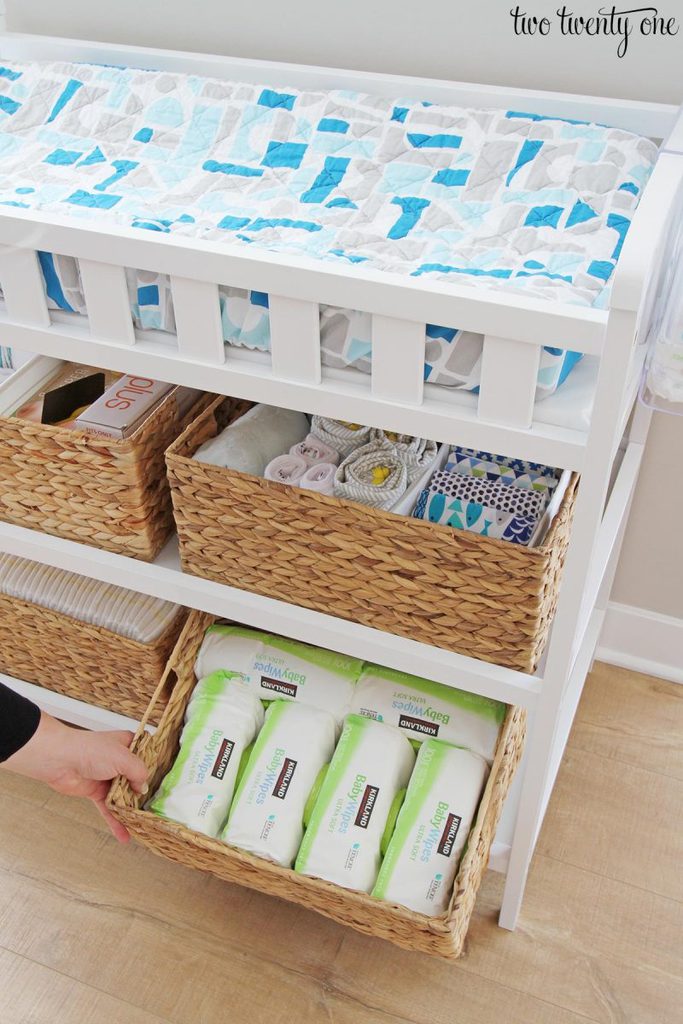
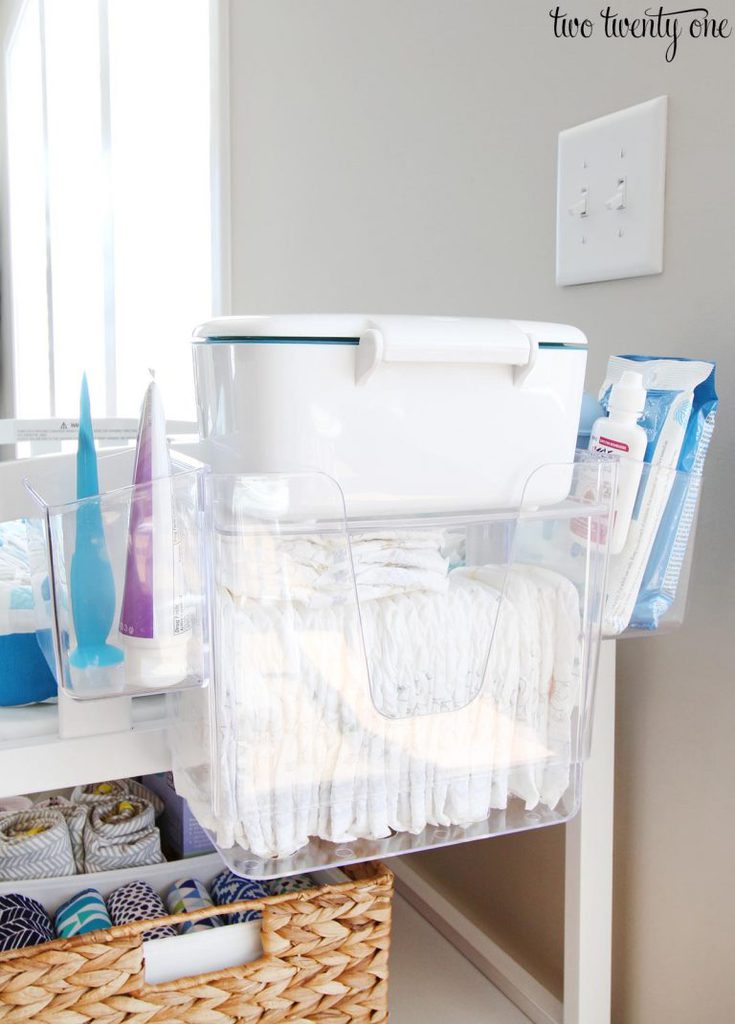
Build topper with either finish nails and glue or pocket holes. The bottom is not necessary. We attached the topper with a bracket on back side to keep in place. Then we can use it for something else once we don’t need the changing table! We adjusted the 32” measurement to 30” to fit our changing pad and wipe container better. That’s the beauty of building the changing table yourself you can adjust measurements to better fit your needs! P.s. we love our OXO Perfect Pull™ Wipes Dispenser

PBK Knockoff Changing Table
Next up, build drawers to fit openings and drawer slides.

(Not pictured) Attach drawer face to drawers with 1-1/4” finish nails and glue, then attach from inside with 1-1/4” screws. It may be easier to attach handles or knobs before attaching the drawer faces. Jon waited to do this until the end.

PBK Knockoff Changing Table

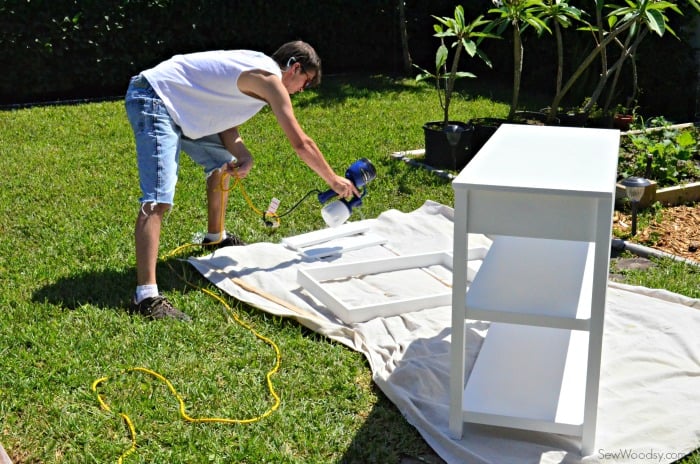
Once your changing table is done, it’s time to paint! We love using the HomeRight Finish Max Fine Finish HVLP Sprayer. If your looking for a clean paint job–this is the tool you need to use. It gives the smoothes finish and uses 1/4 of the paint we would normally use to paint furniture. Plus it has three pressure settings, so depending on what you are spraying you can set the nozzle to spray how you want it too. This helps to give you the ultimate control when spraying! We will NEVER paint furniture any other way again! Jon did 2-3 coats outside letting them dry in between coats. The only thing you need to worry about when spraying outside is dust particles and bugs sticking to your furniture! After the changing table was dry we moved it into the garage and let it sit an additional 72 hours before adding the drawer slides and moving it in the house.

PBK Knockoff Changing Table

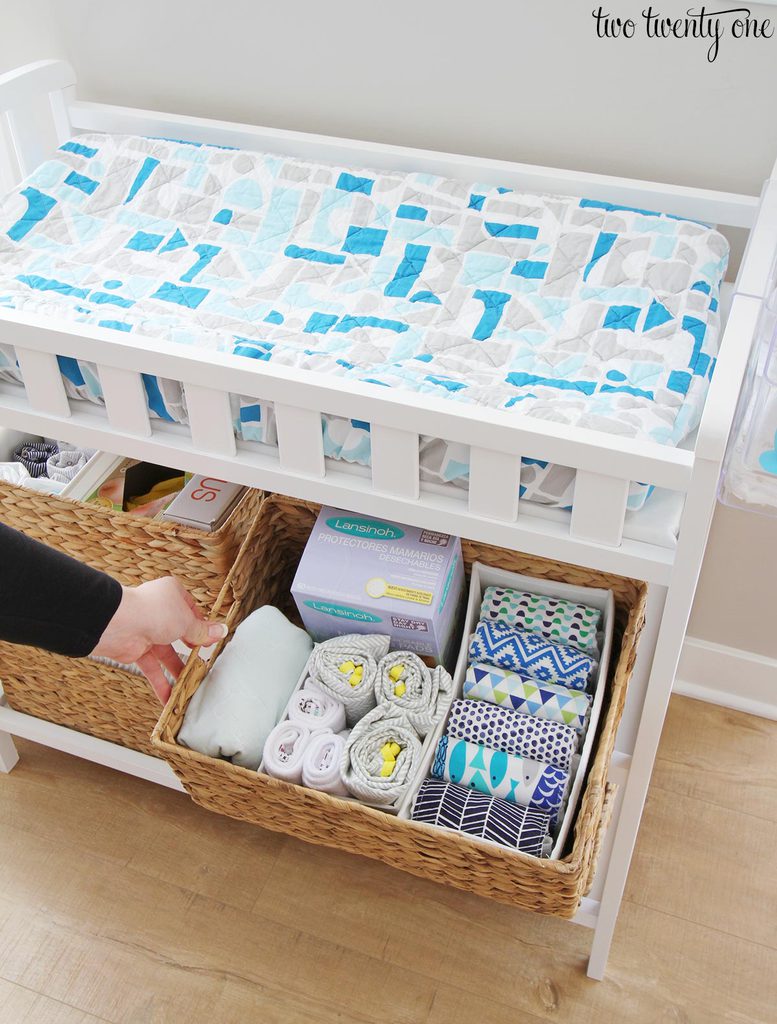
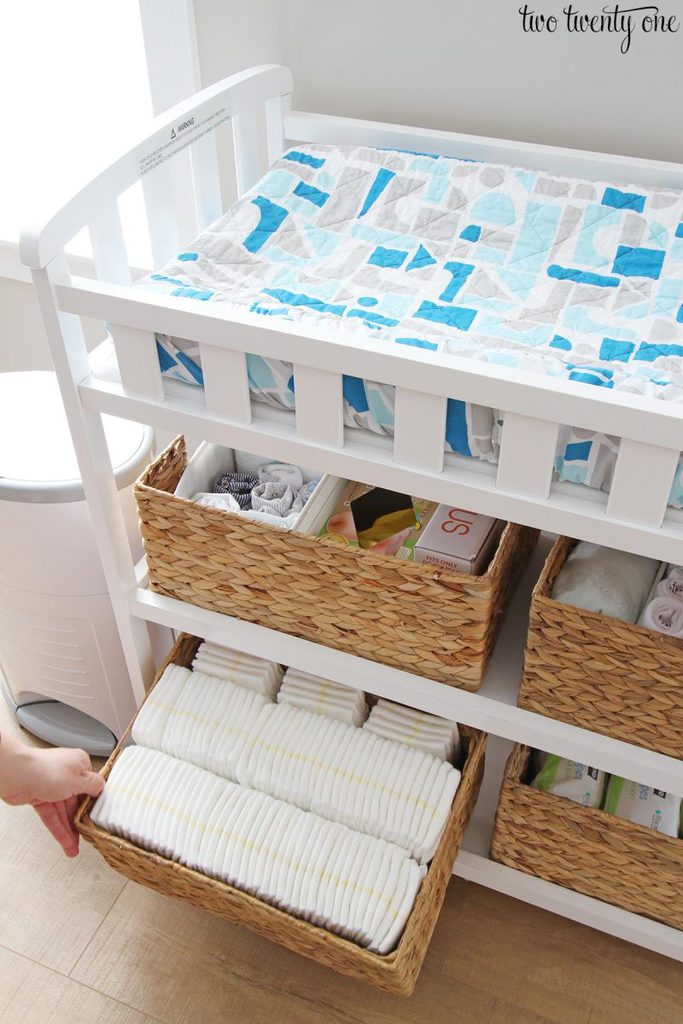
Jon waited to install the drawer slides until after the table was painted. Make sure you insett 3/4” to allow for the drawer face.

PBK Ultimate Changing Table Knockoff

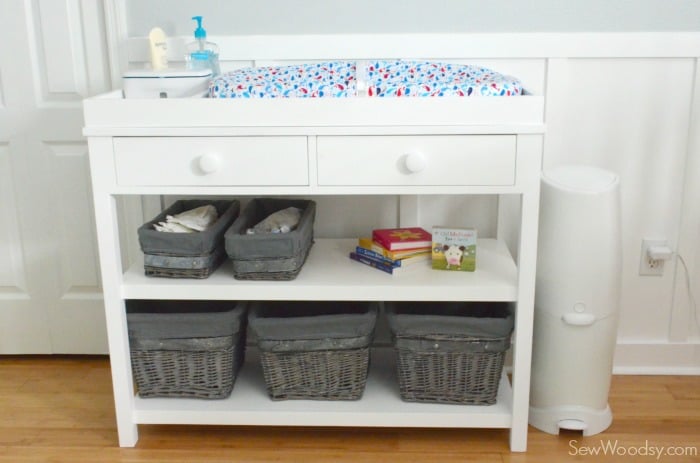
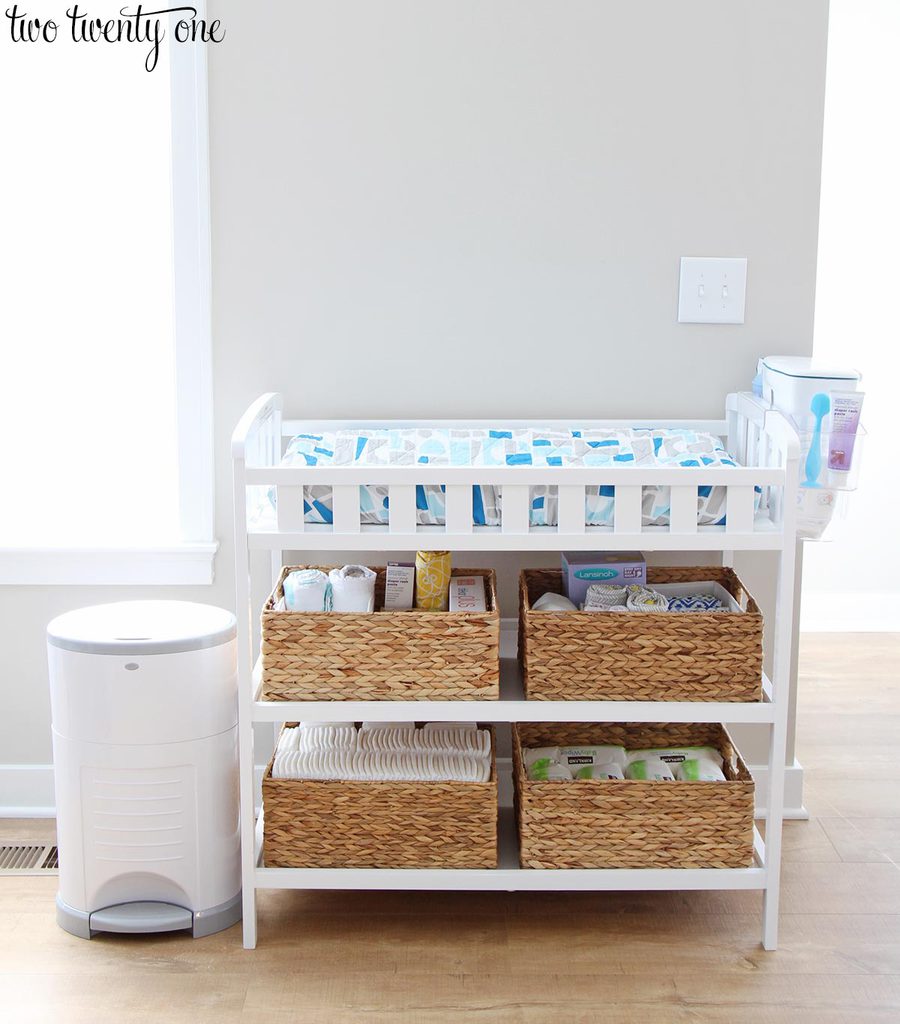
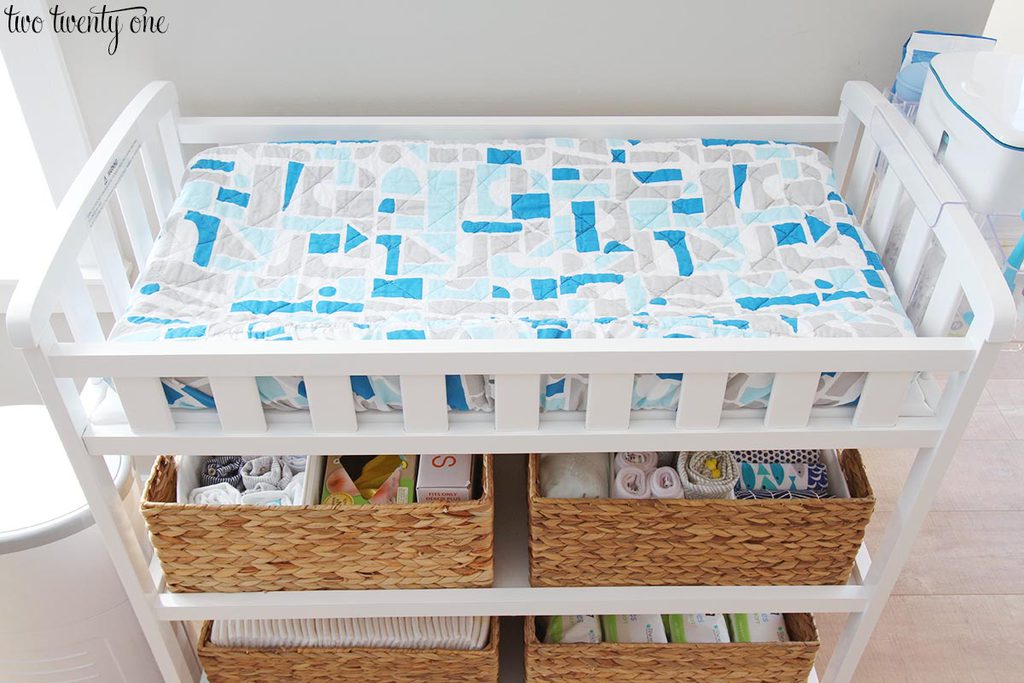
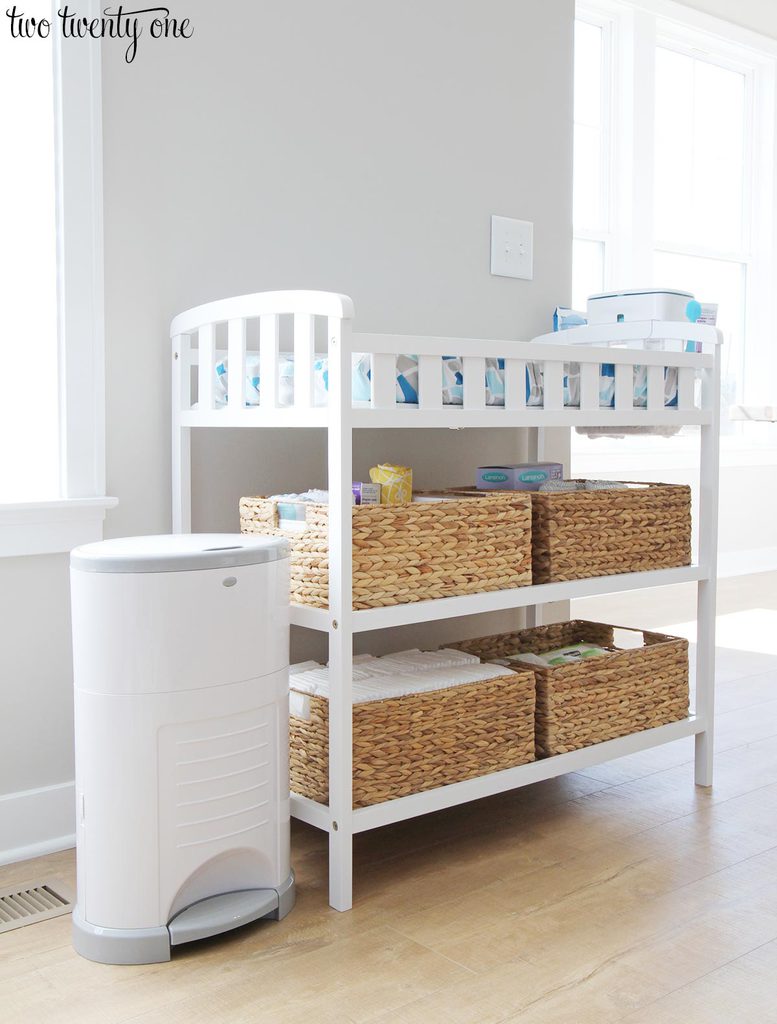
And here it is in all it’s glory! I’m in love with it. And even better we can take the topper off once we don’t need a changing table and use it as an entry way table! Can you believe we made this for $100? It retails at Pottery Barn Kids for $500!!!

PBK Ultimate Changing Table Knockoff

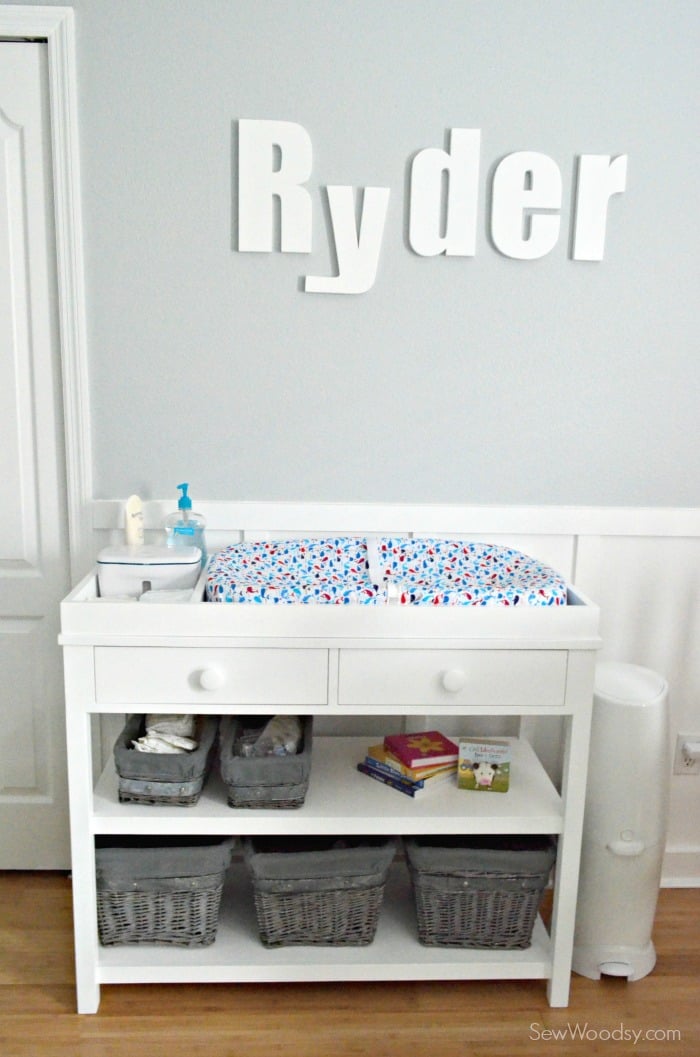
Look for a post on how to make that custom changing table cover next week! It’s so easy to make… you’ll be making a ton in no time! Love the letters above the changing table? Learn how to cut letters using a scroll saw. Yep, you guessed it. We made it!

Here are the other tutorials from our nursery project:

Disclaimer: The brands we mention in this post we absolutely love. We were provided products from them; however, if we weren’t we would have purchased them ourselves. All opinion are our own and do not reflect the brand!

Original article and pictures take http://sewwoodsy.com/2014/08/pbk-ultimate-changing-table-knockoff.html site

среда, 28 марта 2018 г.

Wine Cellar Ideas

Wine cellars are not only storage room for wine bottles or barrels but can also be the sanctuary of the entire home and the place where one would proudly take even the most demanding guests.

Even if you are not a wine lover, you will definitely fall in love with the wine cellars in the pictures below and imagine a smell of sweet wine.

1.)

Source

2.)

Source

3.)

Source

4.)

Source

5.)

Source

6.)

Source

7.)

Source

8.)

Source

9.)

Source
Source
Source

12.)

Source

Original article and pictures take https://www.woodz.co/journal/wine-cellar-ideas/ site

вторник, 27 марта 2018 г.

Changing Table Organization

With Owen, we used his dresser as his changing table. We’re using the same dresser/changing table set up in Emmett’s nursery (still under construction), but we added a changing table into the mix with baby #2.

In our old house, the living room, where we spent most of our time, was in the middle of our house with our master bedroom to the right and Owen’s nursery to the left. So when Owen was a newborn, we only had to walk all of 10-12 steps to his nursery to change his diaper 10+ times a day or change his spit-up-on clothes.

Now that we live in a two-story house, we wanted to set up a changing table on our main floor so we wouldn’t have to go up and down the stairs 10+ times a day while carrying a newborn (and this kid needs his diaper changed more like 14+ times a day). This was especially important for me in the weeks following giving birth when I was encouraged to take it easy.

Since I didn’t want to drop a ton of money, I got this changing table for less than $60 and four baskets at Marshalls. I figured we can sell or donate the changing table once we’re done with it.

The top left basket holds a couple pairs of sleepers, onesies, socks, muslin blankets, diaper cream, nursing cover, diaper bags, and diaper pail refill bags.

I keep an extra nursing pillow cover, nursing pads, changing pad covers, changing pad liners, and DIY burp cloths in the upper right basket.

The bottom left basket is for extra diapers.

And the bottom right basket is for extra wipes.

I love this diaper caddy. It holds a decent amount of diapers and the top spot perfectly holds our baby wipe dispenser. There’s also two smaller compartments for diaper cream, diaper cream applicator (love that thing), pacifier wipes, saline drops, and bulb syringe (we have a Nose Frida, but I prefer bulb syringes for newborns’ tiny nostrils).

The diaper caddy hooks onto the side of the changing table. It slides around a little bit, but it’s never fallen off.

The changing table comes with a pad, but I like how a contoured changing pad keeps babies more contained. And this one was only $14. I scored the changing pad cover from Land of Nod (now Crate & Kids) when it was on clearance for $6, so unfortunately, it’s no longer available.

My parents gifted us this diaper pail. We really like it so far. No smells can be smelled. But then again, newborn diapers don’t really smell anyway. Plus, when Emmett starts on solids we’ll do what we did with Owen’s #2 diapers– put them in a diaper bag and take it out to the big garbage can in the garage.

We love having this changing table on our main floor. I like how I can still keep an eye on Owen while he’s playing or eating breakfast or lunch if I need to change Emmett. And it’s been nice not having to go up and down the stairs numerous times a day.

Changing table organization! Great tips and tricks!

Original article and pictures take https://www.twotwentyone.net/changing-table-organization/ site

четверг, 15 марта 2018 г.

How to Build a Root Cellar : 4 Different Types

How to Build a Root Cellar

There was a time when almost every family had a root cellar of some kind. They all learned how to build a root cellar. However, with the advent of modern refrigeration, DIY root cellars have seemingly lost their value. Refrigerators in the house became a modern convenience, storing all foods between 32 to 40 degrees. But instead of long-term storage of valuable fruits and vegetables, we often find our crispers full of decaying produce that ends up going to the chickens, being composted, or worse yet, ending up in a landfill. It turns out that not all foods are best stored at temperatures as cold as modern refrigeration. Fruits and vegetables such as cucumbers, eggplant, snap beans, peppers, garlic, onions, pumpkins, squash, sweet potatoes, potatoes, tomatoes, tomatillos, and watermelon all prefer a warmer storage temperature closer to 50 degrees, and can actually be damaged by colder temperatures.

Luckily, nature has once again provided the perfect food storage option. With underground temperatures remaining constant at around 52 degrees F, and the presence of high humidity due to soil moisture, a root cellar dug into the ground is the perfect environment for the storage of not only fruits and vegetables, but also aging cheese, fermented vegetables, and jars of canned goods that we have run out of room for in the pantry. For those of us who farm or garden, keeping a root cellar underground or in the basement allows us to properly store the abundance we have been blessed with during the growing season.

Best Location for a Root Cellar

  • Choose a location that is easily accessible. Root cellar conditions need to be monitored, and regular checks for signs of spoilage must be made. A neglected root cellar will be unsuccessful.
  • Choose a north or northeast facing hill, mound, or corner of the basement. Soil can be warmed by the sun, so a north facing hillside or corner of the basement will provide the most steady cool temperatures. If you live in a region with extremely cold temperatures like Alaska, a south-facing option will prevent freezing in your storage space during the winter.

Ensuring Proper Root Cellar Conditions

  • Provide ventilation for air circulation. Fruits and vegetables are constantly releasing off-gasses, some more than others. Some of these off-gasses can create spoilage or affect the taste of neighboring vegetables. Ventilation can be created by leaving space at the point of entry or through ventilation pipes. If you want to get really fancy (and efficient), a low intake air pipe can be installed to allow cool air in, and a high outtake pipe can be installed for the release of warm air and gasses.
  • Food cellar humidity levels. Produce can quickly become dry and shriveled, or begin to break down without proper humidity. Many produce storage items do best in environments with humidity levels between 80-95%. In underground root cellars, these humidity levels are easily maintained in most climates. Basement root cellaring will often require added moisture to maintain these levels. Added moisture can be maintained through moist wood shavings or containers of water left to evaporate.
  • Maintain the proper root cellar temperature. Fluctuations in temperature outside of the ideal range can cause fruits and vegetables to break down. A location that remains unaffected by outdoor conditions is ideal. In some regions, the months during which long-term storage is possible will be limited because of either extreme heat or extreme cold. Your point of access will be the weakest point in maintaining even temperatures, so be sure to face the opening to the north or northeast, unless you live in an extremely cold climate.

Different Types of Root Cellar Designs

1. The in-ground or underground root cellar

The traditional root cellar is dug into the side of a hill, or dug straight down into the ground, well below the freezing point of the soil for a particular region. Ideally the depth of the root cellar allows for standing room. This allows for easy management of goods and creates zones within the root cellar. Cold air sinks and warm air rises, so vegetables such as root vegetables that prefer colder temperatures can be placed closer to the ground.

2. Concrete Block Root Cellar

A dirt root cellar is an option, but leaves your storage space more open to critters who may think that you placed your abundance of produce there just for them. Instead, the root cellar can be lined with bricks, cinder blocks, or poured concrete slabs. Wood can also be used, but will eventually need to be replaced over time. Here at No. 9 Farms, since we live in “tornado alley,” we purchased a prefabricated concrete storm shelter and placed it underground. It works quite well for both purposes.

3. Above Ground Food Cellar

This is an area where you will have less control over temperature, and is more susceptible to critters who think you are sharing, but for milder regions, this can be an excellent option for short and long-term storage. Storing in crates of some kind is recommended for this option.

4. Food Storage in Your Basement

What could be more convenient than having your food storage in your house? On those cold winter days, walking out to the root cellar first thing in the morning isn’t always appealing. An underground basement can provide excellent storage conditions. Choose a north or northeast corner of the basement that is not connected to modern heating and cooling. This type of area can be created even in modern homes by closing off an area with walls and a door in a part of the basement where a vent is not present

How to Store Your Food in a Root Cellar

Check with your local extension office or online guides for specific lists of ideal root cellar temperatures and humidity levels for individual fruits and vegetables. A number of produce items will need to be cured before being placed into long-term food storage.

Onions and garlic should be cured in a warm, dry area in the shade for a week before being trimmed. After trimming, cure alliums for another two weeks. Temperatures in the 80’s and 90’s are preferable.

Potatoes should be cured in cool, dark, moist environment (such as your root cellar if you have room to spread them out) for a couple of weeks before being placed in a container with a lid. A loosely closed container will prevent shriveling.

Sweet potatoes can be tricky to cure because they are often harvested in the fall before freezing temperatures set in. Their ideal curing temperature is 85 degrees with high humidity. In most regions of the country, fall temperatures are well below this level. Here at No. 9 Farms we cure our sweet potatoes in the greenhouse for two weeks before moving them to the root cellar.

Pumpkins and winter squash can be cured at 70-80 degrees for a couple of weeks in a well-ventilated area. If there is concern of freezing nighttime temperatures, be sure to bring your squash indoors to prevent damage.

Cabbages and root vegetables prefer cool, moist conditions. Store cabbages with roots intact along with root vegetables in moist sand near the floor of the root cellar.

The environment of every root cellar will be different, just as the microclimate of every growing space if different. Over time you will get to know your space and the adjustments that need to be made. Listen to your fruits and vegetables—they will let you know if conditions are not ideal. Start small and learn the art of food storage. It will help you break the grocery store paradigm.

Stephanie Oaks lives in Ashland City, Tennessee, where she and her husband own and operate No. 9 Farms, an organic farm that specializes in berries, herbs, fruits and vegetables, and Christmas trees. Stephanie spends the remainder of her time homeschooling their two teenage children and teaching classes on organic gardening and healthy cooking.

Original article and pictures take https://mollygreen.com/blog/keeping-a-root-cellar/ site

среда, 14 марта 2018 г.

35 Creative wine cellars that will inspire you

unique wine cellar/ storage ideas that will inspire you to keep your wine in a creative way.

Article image:

1. The millionaire house

2. Roof cellar

3. Artistic wine cellar

4. Hidden wine cellar

5. Vintage wine cellar

6. The “perfect wine cellar”

7. Rustic wine room

8. Spiral staircase wine cellar

9. London residence wine cellar

10. Wine room

11. Under the stairs wine storage

12. DIY wine storage

13. Modern/vintage wine cellar

14. Posh wine room

15. Wine storage beneath the stairs

61G0w2t4yiL._SL1000_.jpg

16. Wine racking underneath the stairs

17. Vintage wine room

18. Small wine room

19. Large wine room

20. Modern wine storage

21. Walk in wine cellar

22. Walk in wine cellar 2

23. Hidden spiral wine cellar

24. Wine storage under stairs

25. Deluxe wine cellar

26. Fancy wine storage

27. Clever under the stairs wine storage

28. Mediterranean wine cellar

29. Old fashioned wine cellar

30. Hedonism wines

31. Large walk in wine room

32. Glass wine closet

33. Wine and celebration area

34. Glass spiral wine cellar

35. Cosy wine cellar

Original article and pictures take https://healthyeverydaylife.com/2018/11/10/creative-wine-cellars-you-got-to-see/ site